Authentication and Access Control
Central Dogma provides the following modules to configure its authentication layer:
server-auth-saml, which is based on OpenSAMLserver-auth-shiro, which is based on Apache Shiro
They are included in the distribution by default so that you can configure the authentication layer with the following instruction.
Basic authentication configuration
The first step to configure the authentication layer is adding authentication property to the
conf/dogma.json. The authentication is disabled when authentication property is null.
The authentication configuration consists of the following properties:
{
  ...
  "authentication": {
    "factoryClassName": "the fully-qualified class name of an AuthenticationProviderFactory",
    "systemAdministrators": [],
    "caseSensitiveLoginNames": false,
    "sessionCacheSpec": "maximumSize=8192,expireAfterWrite=604800s",
    "sessionTimeoutMillis": 604800000,
    "sessionValidationSchedule": "0 30 */4 ? * *",
    "properties": null
  }
}factoryClassName(string)the fully-qualified class name of the
AuthProviderFactoryimplementation. Can be one ofcom.linecorp.centraldogma.server.auth.saml.SamlAuthProviderFactoryorcom.linecorp.centraldogma.server.auth.shiro.ShiroAuthProviderFactory.
systemAdministrators(string array)login names of the system administrators. A user who has a login name specified here will get the system administrator role.
caseSensitiveLoginNames(boolean)whether case-sensitive matching is performed when login names are compared. Disabled by default (case-insensitive).
sessionCacheSpec(string)the cache specification string which determines the capacity and behavior of the cache for the session information of the server. Refer to the Caffeine API documentation for more information.
sessionTimeoutMillis(integer)the session timeout for web-based administrative console, in milliseconds. If
null, the default value of ‘604800000 milliseconds’ (7 days) is used.
sessionValidationSchedule(string)a Quartz cron expression that describes when the task for revalidating the existing sessions is supposed to be triggered. If unspecified,
0 30 */4 ? * *(at 0:30, 4:30, 8:30, 12:30, 16:30 and 20:30 for every day) is used.
properties(object)an object which describes authentication provider specific properties.
Configuring authentication with SAML
Security Assertion Markup Language (SAML) is an open standard for exchanging authentication and authorization
data between an identity provider and a service provider. In this protocol, Central Dogma acts as a service
provider. So, you need to fill the properties with information of an identity provider that you delegate
the authentication to.
{
  ...
  "authentication": {
    "factoryClassName": "com.linecorp.centraldogma.server.auth.saml.SamlAuthProviderFactory",
    "systemAdministrators": [],
    "caseSensitiveLoginNames": false,
    "sessionCacheSpec": "maximumSize=8192,expireAfterWrite=604800s",
    "sessionTimeoutMillis": 604800000,
    "sessionValidationSchedule": "0 30 */4 ? * *",
    "properties": {
      "entityId": "dogma",
      "hostname": "dogma-example.linecorp.com",
      "signingKey": "signing",
      "encryptionKey": "encryption",
      "keyStore": {
        "type": "PKCS12",
        "path": "./conf/saml.jks",
        "password": null,
        "keyPasswords": {
          "signing": null,
          "encryption": null
        },
        "signatureAlgorithm": "http://www.w3.org/2000/09/xmldsig#rsa-sha1"
      },
      "acs": {
        "endpoints": [
          {
            "uri": "https://dogma-example.linecorp.com/saml/acs/post",
            "binding": "HTTP_POST"
          },
          {
            "uri": "https://dogma-example.linecorp.com/saml/acs/redirect",
            "binding": "HTTP_REDIRECT"
          }
        ]
      },
      "idp": {
        "entityId": "some-idp",
        "uri": "https://idp.some-service.com/saml/single_sign_on_service",
        "binding": "HTTP_POST",
        "signingKey": "some-idp",
        "encryptionKey": "some-idp",
        "subjectLoginNameIdFormat": "urn:oasis:names:tc:SAML:1.1:nameid-format:emailAddress",
        "attributeLoginName": null
      }
    }
  }
}
The following describes the meaning of SAML-specific properties.
entityId(string)an identifier of this service provider.
hostname(string)a host name which is used for generating URLs for an assertion consumer service, a metadata service and a single logout service that are served by this service provider. It should be accessible from a user browser.
signingKey(string)the name of a private key which is used for signing. If unspecified,
signingis used by default. Executing keytool with-genkeypaircommand helps you to create a new key pair in your keystore.
encryptionKey(string)the name of a private key which is used for encryption. If unspecified,
encryptionis used by default.
keyStorethe keystore which is used to encrypt and decrypt exchanged messages.
type(string)the type of the keystore. If unspecified, the type retrieved from
java.security.KeyStore.getDefaultType()is used by default.
path(string)the location of the keystore file.
password(string)the password of the keystore.
keyPasswords(map of string key-value pairs)a map of a key name and its password. If the password is unspecified, the empty string is used by default.
signatureAlgorithm(string)a name of the signature algorithm for signing and encryption. If unspecified,
http://www.w3.org/2000/09/xmldsig#rsa-sha1is used by default.
acsthe assertion consumer service configuration. If unspecified, the default value is used which is
{scheme}://{hostname}:{port}/saml/acs/postand{scheme}://{hostname}:{port}/saml/acs/redirect.endpoints(array of object)an array of assertion consumer service endpoints. Each endpoint has the following properties:
uri(string)a uri where a SAML response is supposed to be sent to.
binding(string)a binding protocol of the
uri. It can be one ofHTTP_POSTorHTTP_REDIRECT. If unspecified,HTTP_POSTis used by default.
idpthe identity provider configuration.
entityId(string)an identifier of the identity provider.
uri(string)a URL where an authentication request is supposed to be sent to.
binding(string)a binding protocol of the
uri. If unspecified,urn:oasis:names:tc:SAML:2.0:bindings:HTTP-POSTis used by default. It can be simply specified asHTTP_POSTorHTTP_REDIRECT.
signingKey(string)the name of a certificate for signing, which is provided by the identity provider. If unspecified, the
entityIdis used by default. Executing keytool with-importcertcommand helps you to import a certificate of an identity provider to your keystore.
encryptionKey(string)the name of a certificate for encryption, which is provided by the identity provider. If unspecified, the
entityIdis used by default.
subjectLoginNameIdFormat(string)the name ID format of a subject which holds a login name. If unspecified,
urn:oasis:names:tc:SAML:1.1:nameid-format:emailAddressis used by default. It means that the email address handed from the identity provider is used as a login name in the authentication layer. You need to consult with the metadata of the identity provider before configuring this property.
attributeLoginName(string)the attribute name which holds a login name. Some identity provider provides a login name by an attribute, instead of a name ID. In this case, you can configure this property, and then set
subjectLoginNameIdFormattonullin order to avoid treating an email address as a login name.
Configuring authentication with Apache Shiro
Apache Shiro is a Java security framework that performs authentication, authorization, cryptography,
and session management. Central Dogma leverages its authentication feature to authenticate a user.
If you want to configure the authentication layer with Apache Shiro, you should configure the authentication
property in your conf/dogma.json as follows. Note that the path of your INI configuration file is specified
in the properties property.
{
  ...
  "authentication": {
    "factoryClassName": "com.linecorp.centraldogma.server.auth.shiro.ShiroAuthProviderFactory",
    "systemAdministrators": [],
    "caseSensitiveLoginNames": false,
    "sessionCacheSpec": "maximumSize=8192,expireAfterWrite=604800s",
    "sessionTimeoutMillis": 604800000,
    "sessionValidationSchedule": "0 30 */4 ? * *",
    "properties": "./conf/shiro.ini"
  }
}
You may configure conf/shiro.ini simply as follows, which uses a local database system of Apache Shiro:
[users]
system-admin = system-admin-secret
dogma-admin = dogma-admin-secret
Note
Apache Shiro supports RDBMS or LDAP based security system as well. You can find the example
configuration files under the conf/ directory in the distribution.
Access Control
One way to configure the access control system for Central Dogma is to use the web UI.
To open the web UI, you may access http://{your-central-dogma-domain-or-ip}:36462 in your web browser.
You may configure a project with HTTP APIs, but we recommend the web UI because it is easier and simpler.
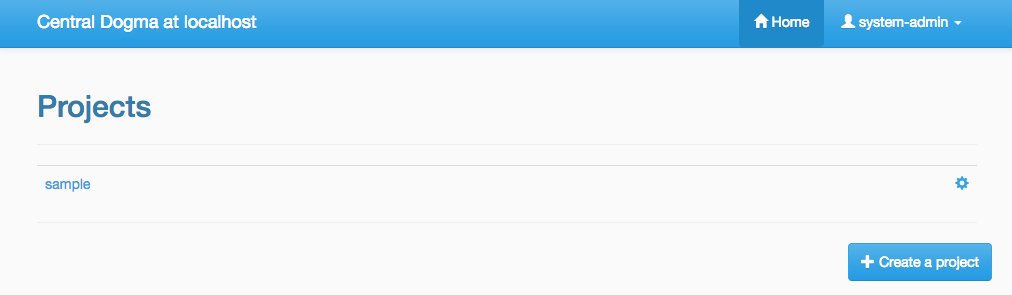
Everyone who is logged in is able to create a new project, and he or she would be an owner of the project. If you have the right to configure a project, in other words, if you are an owner of the project, you can access the configuration UI of the project by clicking the cog icon which is shown on the right of the project name.
If you click the icon, you can see the configuration UI for a project like below. In this page, you can add a user or a token as a member of the project and can also remove them from the project.
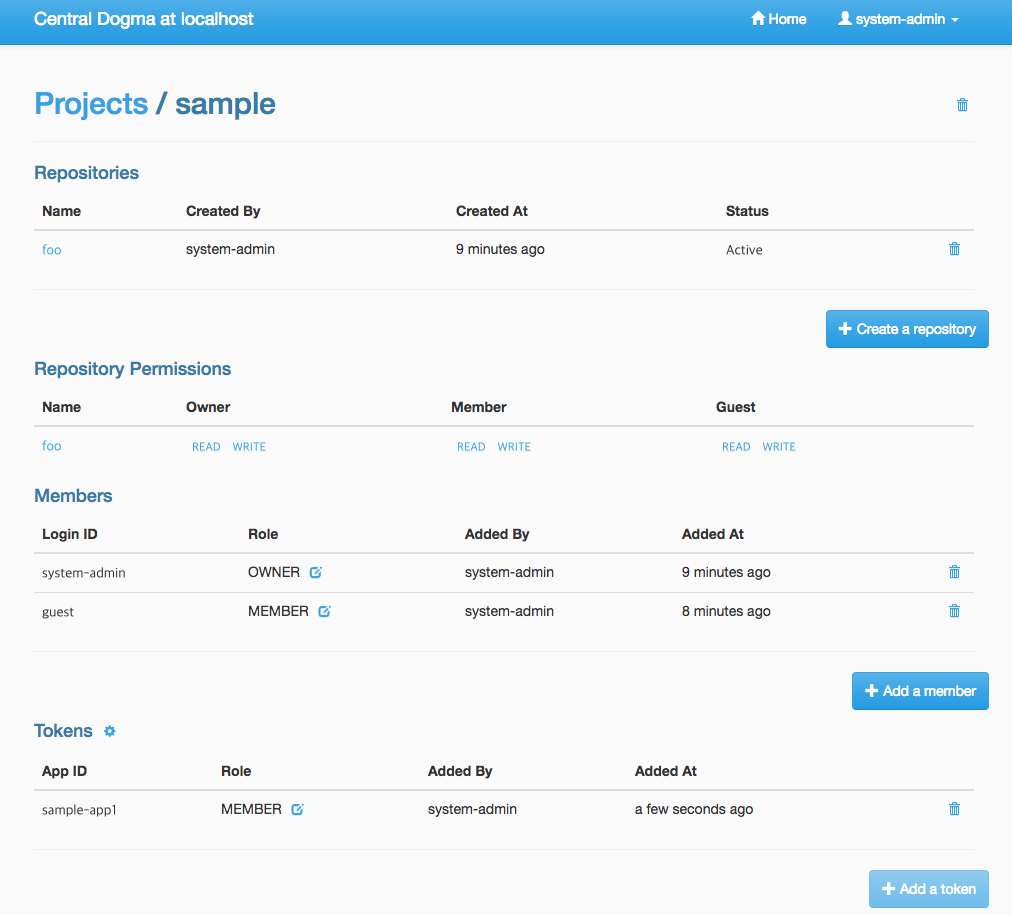
When you add a user as a member of the project, you need to choose the role of the member.
There are 4 user role types in the access control system of Central Dogma, but you can choose one
of Owner and Member role in the UI. More information about the role is as follows.
System Administratorthe user that all permissions are assigned to, a.k.a ‘super user’. Only a system administrator can restore removed project. The system administrators can be configured in
conf/dogma.jsonas described the above.
Ownerof a projectthe administrator of a project. A user who creates a project is to be an owner of the project by default. Owners can add a user or a token as an owner or a member of the project, and can create a new repository. Also, they can remove the repository or the project from the system and can configure permissions for each role, member and token.
Memberof a projectusers who can see the configuration of a project, but members are not allowed to change the configuration.
Guestof a projectusers who is logged in but is neither an owner nor a member of a project. Guests are not allowed to see the configuration of a project.
Note
Do not forget to make a new Application Token before adding a token to a project. Add a token
button would be disabled if there is no token. The cog icon on the right of the Tokens title
brings you to the Application Token management page.
You can see the configuration UI for a repository when you click the name of repository in the
Repository Permission list. The following image shows the configuration of the repository called main.
In this page, you can do the followings.
Changing the role of a member or a token in a project
Setting permissions of each role for a repository
Setting permissions of a specific member or token for a repository
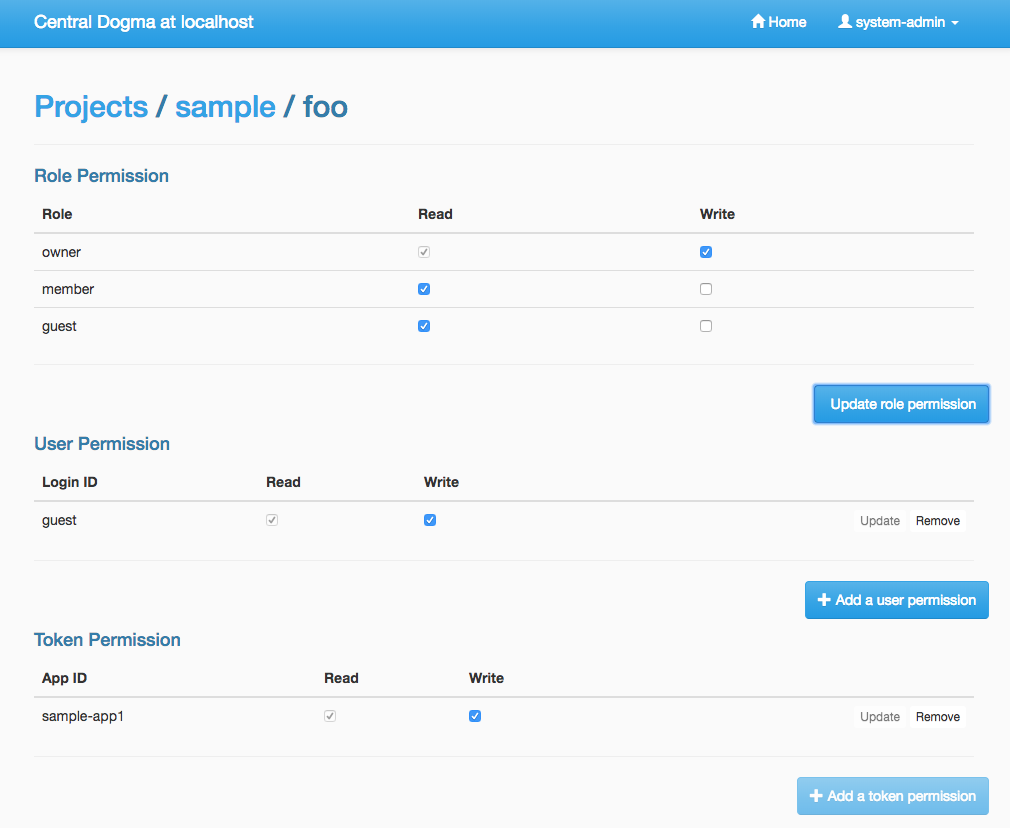
Permissions can be specified for a repository only. So a user can configure their repositories with different
access control levels. There are only two permission types currently, which are READ and WRITE.
WRITE permission implies READ permission, so you cannot give only WRITE permission to a user,
a token or any role.
Every access of HTTP API will be controlled by the access control system. A request is allowed only if the user of the request has sufficient permissions. If permissions for the user are specified in the repository configuration, it would be used first to control the request. If it does not exist, permissions for each role of the repository would be used to do that.
Application Token
When a user uses the web UI, he or she should login first to get a token for a new web session. But what
should a user do when he or she uses one of Central Dogma clients? The user may log in to a Central Dogma
server via HTTP API and get a session token. But it is inconvenient and the user may write more complicated
code because the user should log in again when the session token is expired. Application Token would be
useful for this case.
Application Token is like a virtual user, so it can have any role in a project. Also, its permissions
can be specified in a repository configuration like a member. To get a new token, a user can use
Application Tokens menu of the web UI. Application ID has to be unique to identify where a client
request comes from.
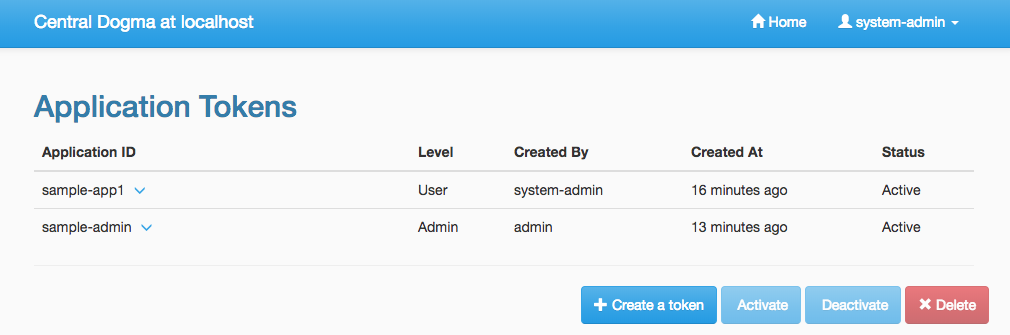
Anyone who is logged into the Central Dogma can create a new Application Token, and the token is shared
for everyone. So any owner of a project can add any token to their project. However only both the token
creator and the system administrator are allowed to deactivate and/or remove the token.
There are two levels of a token, which are System Admin and User. System Admin level token can be
created by only the system administrators. A client who sends a request with the token is allowed to access
system administrator-level APIs.